
How it works

Step 1
Signup and Create Events

First signup and create a login with your email address and password. After logging in, create an event with a name and a date. You can also upload a custom overlay that is rendered on top of photos taken at the event.
Learn more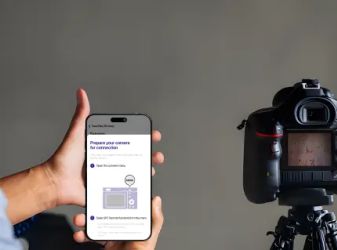
Step 2
Setup and connect your camera
At the event, setup your camera as a Photo Booth with a nice background. Download the Pixely Controller app for iPhone (reg). Use the same login as in Step 1, to login to the app. Select the event that you created. Then, start a session to automatically connect your camera to the app. If you do not have a camera, you can also use the iPhone built-in camera.
Learn more
Step 3
Take and send Photos to guests
During the event, ask guests to pose for photos. Each photo appears in the app in realtime. After all the photos are taken for that guest, end the session and collect contact info for the guest. Pixely automatically sends the guest a link via email to view and share their photos. Start a new session for the next guest.
Learn moreDownload the app now!
Sign up to the Pixely web app to set up your account and
your first event. Download the Pixely Controller app to
configure your camera and snap amazing photos of your
guests.
![Download Pixely App]()
Resources and insights
Join our community
Get inspired and share your ideas! Join our Pixely community for insights on upcoming features and to connect with fellow Pixely enthusiasts.
Ready to use Pixely?
© 2025 Alokin LLC | Terms of Service | Privacy Policy